Learning how to TIG weld aluminum may seem like an intimidating process. But, with some knowledge and practice, it’s easier than you might imagine getting it right. In this article, we will look at TIG welding aluminum in more detail to help you achieve the results that you need.
Is TIG Welding Aluminum Possible?

Yes, many products are made with aluminum which reduces their weight and increases their integrity at colder temperatures. Aluminum is found in many applications, including cryogenic pipe manufacturing, boat components, truck, and trailer construction, and more. But, when aluminum is welded, there are significant challenges; the heat input is hard to control, and dealing with the oxide layer is difficult.
The traditional process to deal with these challenges is gas tungsten arc welding (GTAW). It improves the aesthetic appeal and integrity of the weld. If you want to get high-quality stacked-dimes welds with GTAW and aluminum, it takes a lot of skill and practice. Following the best practices will help, but there are no substitutions for the experience.
How Hard Is It To TIG Weld Aluminum?
Aluminum is less forgiving than steel and other materials. In fact, it can make the TIG welding process a significant challenge for less experienced welders. Even if a “simple” welding machine is used there are simple steps that must be followed to create a successful weld joint.
What Do I Need For TIG Welding Aluminum?
When you learn how to TIG weld aluminum, the first thing that you need to understand is that a shielding gas is required. This gas is usually argon, the surface must be cleaned to remove any oxide.
In addition, a non-consumable tungsten electrode is needed. The oxide has a higher melting point than the aluminum workpiece, and that’s why it must be removed before the welding begins.
Steps On How To TIG Weld Aluminum
There are five TIG welding aluminum steps to follow if you’re new to this process and you want to improve your chances of success:
1. Good Hand and Torch Placement
New TIG welders are prone to the production of a large quantity of scrap because they don’t have good hand placement and control before they strike the arc on the material. Aluminum acts as a heat sink and it will transfer heat away from the welding area. Also, this makes the control of the weld puddle critical.
Brace the torch with the base of the hand and keep it flat on the table. The torch should be held at a 5-15º backward tilt and moved forward steadily. A close distance between the tungsten and aluminum workpieces must be maintained. The ideal distance is from the tungsten diameter up to around ¼” to prevent overheating and a loss of puddle control.
2. Smooth Movement and Filler Deposition
Before you strike an arc, put on your gloves as you would normally. Then, work on the flow of your hand movements. The movements of the welding torch must be smooth and steady across the welding table. If you keep your hand stationary and move your fingers, you’re already a 1” or 2” welder, and this is not useful.
So, practice the tungsten and work-piece distances and the welding torch movements to minimize scrap. The metal filler deposition should occur ahead of the torch as you move it forward. The welding torch and filler rod should be kept in a 90º configuration respective to each other.
The torch should be pushed and not dragged, and the filler should be introduced at the leading edge of the weld pool. Dab the filler metal with one hand as you slide the torch forward smoothly with the other.
This is not easy, most people have a natural tendency to move both hands at the same time, and this causes contamination. Coordinating and mastering these hand movements is the key to success when you’re TIG welding aluminum.
3. Puddle Control Practice
Aluminum heats quickly because it acts as a heat sink, and it will get hotter faster than most people expect. So, it’s important to monitor the puddle carefully as you move along the work-piece to keep the width of the puddle even and consistent. If the puddle becomes too hot, it’s time to ease up on the controls to keep the width consistent.
At the edge of the work piece, there is even less aluminum to absorb the heat, and the puddle tends to wash out even faster in these areas. Easing up on the pedal will help, but you must put sufficient heat into the puddle. Otherwise, it will disappear, and the surface will be etched.
Again, practice is essential; lay down a puddle with no filler metal multiple times to maintain the puddle width, distance, and speed. If the work-piece becomes too hot, place it aside and continue with another one until you’re happy with your puddle control.
4. Filler Metal Deposition

Once you’re ready, it’s time to consider the introduction of filler metal to the puddle. The key to success is consistency; the filler should be introduced with a dab and move action. Excessive torch movements are not needed; the filler metal dabbing creates the weld bead profile.
Once the puddle is established, the filler metal is added to the puddle edge, and consistent torch movements and puddle control will lay a proper weld bead.
5. Advanced Features and Weld Parameters
There are TIG welding machines that allow the user to fine-tune the welding arc to match the desired joint design or to tailor the appearance of the weld bead.
The frequency, balance, and amperage can be tuned to control etching, cleaning, and weld bead finish to a very precise degree. This is desirable because the puddle contamination risk can be minimized, and it’s easier to compensate for the heaviness of the oxide layer.
The frequency function settings can focus the arc, higher settings are tight and are ideal for precision in tight areas, and lower settings are wide for a flatter bead on butt joints. Becoming comfortable with these features and matching them to your unique needs and preferences is essential.
Practice your new welding skills with scrap aluminum pieces until you’re confident that you know how to TIG weld aluminum.
How Long Does It Take To Learn To Tig Weld Aluminum?
To gain basic competence with TIG welding aluminum, you’re looking at around 40 hours of practice. To put this into perspective, you can learn passable stick welding in 6-8 hours and MIG welding in only a couple of hours.
So, TIG welding is a significant time investment, and ongoing regular practice is needed to develop those skills further.
How to TIG Weld Aluminum- In Conclusion
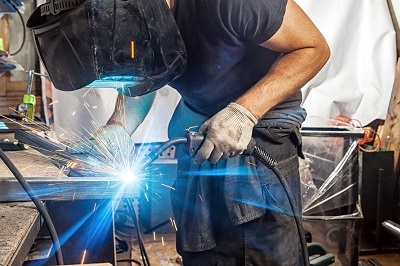
When you’re learning how to TIG Weld aluminum, it’s important to wear proper PPE, including safety glasses, a welding helmet, gloves, and a welding jacket. Aluminum is highly reflective, significant energy is required for welding, and the GTAW arc intensity can easily burn exposed skin.
The latest welding helmets have visibility improvements that make it much easier to monitor the weld pool clarity. This can improve the results and reduce eye strain and fatigue, which will justify the investment in TIG welding.